Agile Testing Mindset: A change to empower quality

Let’s start at the beginning. When we talk about Agile development, we have an almost inherent perception of producing high-quality software in the shortest time possible. In addition, to maximize the value of the business by delivering part of the solution, which generates value, incrementally, and iteratively. With this idea in mind, we began the design and deployment of a multidisciplinary team in an Agile framework. However, in reality, it can be seen that quality tends not to be the priority in the team since it is often displaced by the pressure of time-to-market that stakeholders, with good reason, exert throughout the workgroup.

This phenomenon, recurrent in most of the projects in which I have been able to participate, obviously leads to a greater problem. On the one hand: We comply with the requirements, we deliver the product on time, we launch the releases; in short, we deliver more and more work. However, on the other hand, the quality of the product and the motivation of the work team are damaged, which generates stress and reluctance in the people involved in the development of the product in the long term.

Agile Testing approach

An alternative approach that attempts to solve this phenomenon is called Agile Testing. It was born as a test practice that follows the principles of agile development. This approach is composed of activities that ensure the generation of quality software throughout the agile framework. By knowing the level of agile maturity of the team -including the company where those involved in the production of the product operate-, these activities are executed based on a list of responsibilities and a framework that synchronizes and directs the “test-driven development”. Promotes early and cross-cutting participation of software testing at all levels of the production process.

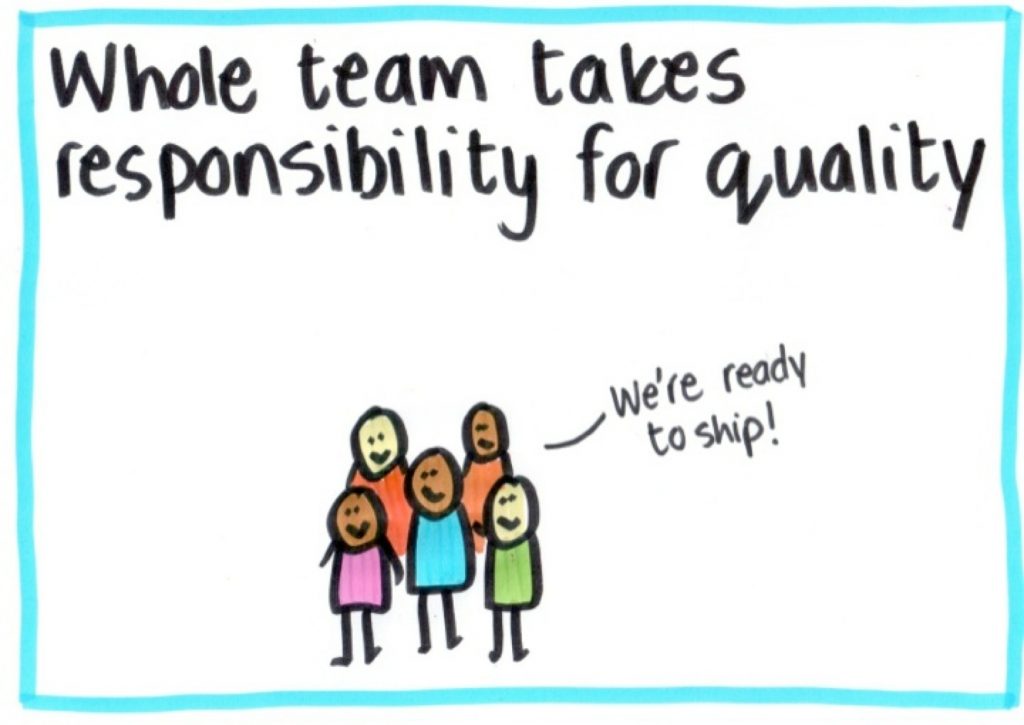
What is new about this Agile Testing approach is determined by the involvement of the “Whole Team”. That is, everyone is responsible for quality. Everyone has a responsibility to ensure that they deliver a high-quality product. Everyone has the slogan to contribute to the quality of the software. This approach uses the technical skills of team members to proactively and early check their work at the pace of the project. It seems that by common sense we should carry out these activities; however, sometimes common sense is the least common and more so when there is pressure to deliver the work in the agreed time. I don’t mean to deliver less work, I mean to change your mindset. To stop appointing the quality engineer as solely responsible for the quality of the product. I mean, we all get involved in quality and take advantage of our technical and soft skills to enhance it.


A crucial problem that I notice in the implementation of agile practices is the lack of commitment of the workgroup to participate in the activities that are defined, which leads to demotivation for continuing the practices tending to distort them. In my experience, training, and deploying agile teams, I can conclude that we should first develop the agile “being” and then the “doing”. For this reason, the team must internalize the Mindset for the execution of the tasks to be carried out in the project. Agile Testing is a framework that tries to solve this problem by emphasizing the Mindset of people and encouraging them to get involved in the quality of the product developed at each stage of the development process.

Agile Testing Manifesto

There is Agile Testing Manifesto -similar to the Agile Manifesto- which aims to guide the commitment and behavior of the team. It supports defining the correct parameters that the team can follow within an agile framework. This Manifesto prioritizes the “being” that those involved should be clear about to start any project and then execute each iteration. In this regard, Samantha Laing and Karen Greaves (2016), in their Book “Growing Agile”, express the following:

  1. Testing throughout OVER testing at the end”: This would mean changing the paradigm and making early involvement of quality activities. That is, change the Quality Control for Quality Assurance.
  2. “Preventing bugs OVER finding bugs”: This means that we must break the traditional premise of “our mission is to find all defects”. On the contrary, we must really work as a team so that defects can be avoided in advance.
  3. “Testing understanding OVER checking functionality”: That is, understanding the business, what the user wants, why he wants it, and not just comply with the documented specifications.
  4. “Building the best system OVER breaking the system”: It refers to focusing the tests to develop a better system. Collaborate and lend our knowledge to build the best possible software.
  5. “Team responsibility for quality OVER tester responsibility”: I reiterate, the key point to deliver a quality product is to have the entire team committed and work together to generate a better result and make a difference. All engaged in agile activities and practices.


Now, within this new framework, there is a new role that will have the mission of collaborating with the team at a functional and technical level. This new role called Agile Tester must have the ability to communicate agile practices. Likewise, it will guarantee that all those involved are concerned about the quality of the process from the role where they are located. The Agile Tester will have a technical mastery and focus on the business. In this regard, Lisa Crispin and Janet Gregory (2009), in their book “Agile Testing: A practical guide for testers and agile teams.” propose 10 principles that the Agile Tester must develop and are the following:


1. Provide continuous feedback to the team and the business

2. Keep actions and decisions simple

3. Enable face-to-face communication

4. Practice continuous improvement

5. Focus on people

6. Deliver value to the customer

7. Respond to change

8. Self organize

9. Have courage

10. Enjoy

These principles dominate the development of soft skills. In addition, they have a close relationship with the Mindset of an agile team. Finally, they empower the leadership that is needed to direct, motivate, and guide the activities that diminish over time in a traditional agile situation.

For the implementation of the Agile Testing Manifesto and the principles, we can make use of various dynamics and liberating structures. These try to help people internalize the new paradigms in the entire work team. However, the key to this new framework is having the team’s commitment to do things differently.

If we want different results, let us stop doing the same.”

Albert Eisten

Learn more from our team here, or check out our services.


How to Translate Salesforce Custom Labels Cheat Sheet

Custom Labels are custom text values that can be accessed from Apex classes, Visualforce pages, or Lightning Web Components and allow developers to build multilingual applications to provide a localized user experience.

We have a more detailed guide on localization with Salesforce Custom Labels, but below is an easy cheat sheet covering the basic mechanics. You’ll learn how to easily translate all Custom Labels from any application into a new language, whether translating with Google Translate, like below or through a human translator.

Salesforce Custom Label Translation Cheat Sheet

1. First, on your org code directory, go to src/labels to download CustomLabels.labels. Now go to src/translations to download the most current and complete translated language, for instance, fr.translation.

2. Rename both files as .xml.

3. Open MS Excel (at least 2007 version) and select the Developer tab. Go to XML, click on Import button and select the CustomLabels.xml file.

4. Delete all columns except ns1:fullName and ns1:value.

5. Filter column ns1:fullName with Contains Labels.

6. Select columns ns1:fullName and ns1:value (and its rows), then go to Find & Select. Go to Special, select checkbox Visible cells only, and then click the Ok button.

Now you can copy only the rows that are displayed within the filter.

7. Open Google Docs and choose the Blank Sheet option.

8. Paste copied rows directly into the Google Sheet.

9. Select all columns, then go to Data->Sort Range and select to order first by ns1:fullName and second by ns1:value. We have to do this because we need at least one of the label columns to be sorted so that when we are looping through the other set of data, we are sure we are looping all possible labels.

10. Add a new header to ja.translation.xml file, name it Translation. Add in the first cell =GoogleTranslate (<ns1:value cell>, “en”, <CodLeng>). For example: =GoogleTranslate(B2, “en”, “ja”), then copy or drag the cell until all the rows have been translated.

11. Copy all Google Sheet columns and paste them at the left of the Excel sheet fr.translation.xlsx like this:

12. Add a column in which we will match label cells hence the translation) from both tables with this formula: =VLOOKUP($G2;$A$1:$C$1 91;3;FALSE). The $ character is used to fix a column or a row depending on its placement. (If it is before the letter, that column will be fixed despite copying the formula to other columns. If it is before the number, you are fixing the row.)

  • $G2 is the first cell from the right dataset which contains the first custom label name and will loop through $A$1 up to $A$191 (in this example), searching to match labels.
  • The range ($A$1:$C$191) is fixing the column and row of the left set of data.
  • 3” indicates which value from the range of data we would like to copy when there is a match in the search, in this case, it will be doing so from the Translation column.
  • FALSE” forces that the formula only retrieves a match by exactly matching the label names.

13. Delete those cells where the formula returns #NA (meaning, there was no match between label names).

14. Where a translation was returned, replace the right dataset cell from column ns1:label with this value.

15. Once done, delete the left dataset (A to C columns) as seen in the above screenshot leaving ns1:label as Column A.

IMPORTANT: ns1:label2 and ns1:name3 are created for custom tabs values. We need to translate these, save the translation somewhere else and delete them from ja.translations.xlsx. 

We will later add them to the ja.translations.xml this way:

<customTabs>
 <label></label> 
 <name>DocumentLibrary</name>
</customTabs> 
<customTabs>
 <label></label>
 <name>Tasks</name> 
</customTabs>

16. Save the Excel sheet, go to Developer:

17. Click on Developer:

18. Click on Export and save the file as <CountryCode>.translation.xml.

19. Remove the .xml extension.

20. Add any customTabs deleted together with their translations as described in Step 15. 

And that’s it! Learn more from our team, or check out our services.

Salesforce Certification: Nonprofit Cloud Consultant

At Oktana, we are committed to Pledge 1%, an initiative founded by Salesforce that encourages companies to give back to their local communities. We’ve also worked with several nonprofit organizations for years, helping them integrate with Salesforce products.

What is Salesforce Nonprofit Cloud

Salesforce believes business should improve the state of the world, so shortly after the company was founded, they created a foundation now known as Salesforce.org. Over the years, Salesforce.org has directed effort to enable nonprofits and educational institutions with Salesforce solutions to meet their needs.

When Salesforce.org first moved down this path, they launched the Nonprofit Starter Pack (NPSP) which provided a basic set of functionality that made Salesforce more nonprofit “friendly.” With the Nonprofit Starter Pack, nonprofits could migrate their data and customize Salesforce to manage fundraising, donation management and satisfy a variety of other nonprofit use cases. In 2018, they took it to the next level and launched Salesforce Nonprofit Cloud.

Over the past few years, we have helped nonprofit organizations do everything from build full apps to implement custom communities. In 2020, we were accepted into the Salesforce.org Partner Program, a program many nonprofits rely on to integrate Salesforce products.

Part of the process of becoming a Salesforce.org partner required becoming certified on the Salesforce Nonprofit Cloud. We spoke with two members of our team, Lucas and Nery, on what it took to earn this consultant-level certification. They both happen to work in our Paraguay office and are passionate about giving back – throughout the COVID-19 pandemic Nery has 3D-printed face masks.

Salesforce Nonprofit Cloud Certification

The Basics

  • Being a Salesforce Certified Administrator is a prerequisite.
  • The certification enables you to design and implement solutions that are maintainable, scalable, and meet nonprofit business requirements.
  • Both Lucas and Nery agreed it takes approximately 3 to 4 months to prepare for the exam.


Nery, who is a developer, suggests you change your mindset from Admin to Cloud, grasping the bigger picture. Considering you already have your Admin knowledge as a base, you primarily need to focus your study on the nonprofit-specific functionality of Salesforce Nonprofit Cloud. He recommends reviewing the permissions and import/export rules because this can be confusing at first. 

Lucas offers additional advice. As a QA engineer, he considers it important to understand very well the table of triggers that work with the Success Package. For each of the packages Salesforce offers, there are external roadmaps that help you learn the specifics and give you detailed information that can help you pass the exam. This certification doesn’t need code, it is only about managing the platform efficiently and effectively.

They both agree this certification greatly helps when working with a nonprofit organization. Salesforce Nonprofit Cloud provides very practical solutions to manage grants, organize volunteer hours, implement forms that can be integrated into volunteer communities and many other functionalities.

How Nonprofits use Salesforce

We recently helped a nonprofit organization build a community platform focused on empowering breast cancer patients with resources for diagnosis, treatment and recovery. The goal of the platform was to guide patients along their journey, facilitating connection between individual patients and health providers. Built on Salesforce, you can read the complete story.

Should you become a Salesforce Nonprofit Cloud Consultant?

If you are already a Salesforce Certified Administrator, the Nonprofit Cloud Consultant certification will provide a more specialized Salesforce career path. If you are interested in working with nonprofit organizations, you should definitely consider this path. 

Here is a list of some resources that will help you out:

If you are part of our team, Oktana will provide you with some extra resources to help you successfully pass the exam and continue to develop your career with Salesforce. If you’re interested in joining our team, check out Oktana Careers.


Test Automation & Continuous Integration with Salesforce DX

Meet the Salesforce Developer Experience, Salesforce DX

Salesforce DX provides you with an integrated, end-to-end lifecycle designed for high-performance agile development. Learn how to integrate the Salesforce DX with automation framework and Jenkins to automate testing and achieve continuous integration.

Before you get started

Ensure you have these things set up so you can follow the steps of this module:

If you’ve completed the App Development with Salesforce DX Trailhead module, likely you already have the tools you need to complete this module. If you’re unsure, we recommend heading over to Trailhead first.

What is Continuous Integration?

Continuous integration (CI) is a software development best practice. When using CI, all code that development teams produce is merged into a central repository, where an automated build can validate it. This practice helps development teams detect problems, identify bugs, and allows them to fix them before releasing changes to their customers.

CI is like an insurance policy. Would you risk driving around town without car insurance? No way! In today’s world of agile development, it’s easy to push changes to your orgs. With a CI system in place, even the smallest change is processed to ensure your system continues to work flawlessly. Early detection and fixes are key for happy software stakeholders.

So now you know that CI can help your company save money. Next, we’re going to walk you through the steps to set up CI with Salesforce DX.

Continuous Integration with Salesforce DX

When using automation, it is preferable to create a disposable environment (like a scratch org) to test specific code/changes instead of introducing these changes to a shared org. Salesforce CLI allows you to automate the creation of scratch orgs as part of your CI process. Another cool feature is that Salesforce CLI enables you to completely script all these tasks in the CI configuration file whether you are using org-based or package-based development.

What is a Salesforce scratch org?

A scratch org is a dedicated, fully configurable, and short-term Salesforce environment. 

It allows developers to emulate different Salesforce editions with different features and preferences playing a critical role in development productivity and collaboration. They can also be used as part of automation testing and the implementation of a full CI suite.

It is possible to share the scratch org configuration file with other team members, so everyone can have the same basic org.

Scratch orgs increase developer’s productivity and collaboration during the development process, and facilitate automated testing and continuous integration. You can use the CLI or IDE to open your scratch org in a browser without logging in.

Note: If you try to just install the Salesforce CLI and run Salesforce DX commands, you’ll find quite a few commands will first need you to authenticate into a Dev Hub. This functionality is what allows you and your team to create and manage scratch orgs.

What is a Salesforce Dev Hub?

A Dev Hub provides you and your team with the ability to create and manage scratch orgs. Scratch orgs are temporary Salesforce environments where you do the bulk development work in this new source-driven development paradigm.

To get started with scratch orgs, you choose an org to function as your Dev Hub. While you can enable Dev Hub in any paid org, it’s always best to practice somewhere other than production. Instead, go ahead and enable Dev Hub in a Developer Edition org or Trailhead Playground to use with this module.

  • Can be your Dev or Prod Org.
  • Used to manage/track Scratch Orgs.
  • Link Namespaces to your orgs.
  • Create and manage second-generation packages
  • Is disabled by default. Once enabled, can’t be disabled.

Understanding the Salesforce Development Process

Diagram of Salesforce development process: Org based vs. source/package development
  • Org based model, in which as the name indicates, orgs are the source of truth. Almost the same as the previous models but this time changes are developed and released through Ant migration, metadata API deploy and retrieve.
  • Source/Package development, which is SalesforceDX’s way of development, we are going to use the new scratch orgs in which changes are developed using Salesforce DX CLI (source push/pull commands) and are then released using Metadata API Deploy. In this case we switch from Org Based to Source based, this way our source of truth is going to be our VCS i.e github, bitbucket, assembla.

It is important to note that instead of the traditional Org based development model, where development is done in sandbox/developer orgs then source code is pulled from such orgs to be stored in the metadata API format, a package based development model is recommended using the Salesforce DX project and scratch orgs. 

That being said, moving away from the org-based development model doesn’t mean that you don’t need proper environment management, it’s just the developers’ org that are replaced with scratch orgs. Integration and QA testing is also done in scratch orgs while the validation, testing, and UAT continues to happen in their dedicated sandboxes. In this scenario we may still want to use DevPro Sandboxes to perform some types of testing like Load testing.

Let’s get started!

Let’s go through our preconditions:

  1. Install Salesforce DX – CLI (using NPM):
    • npm install sfdx-cli –global
    • sfdx –version
    • sfdx –help
    • sfdx force:auth:web:login -d -a DevHub (Used to login to your DevHub)
    • sfdx force:project:create -n MyProject –template standard (to create an standard clean SFDX project)
  2. Enable your DevHub:
    • Log into your Org.
    • Setup > Search Dev Hub
    • Enable Dev Hub!
    • Dev Hub available in: Developer, Enterprise, Performance, and Unlimited Editions.
  3. Start Creating Scratch Orgs:
    • Define your project-scratch-def.json file
    • sfdx force:org:create -f project-scratch-def.json –set default username (to create a scratch org based on your `definition` file.
    • sfdx force:org:list (to list all your linked dev hub and scratch orgs)
    • sfdx force:org:display (to display data of your scratch org)
    • sfdx force:source:push (to push code to the org)
    • sfdx force:source:pull (to pull code from the org)

Note: On project-scratch-def.json, probably the most important file to start with for scratch orgs it this. Here we can define what the shape of the scratch org is. Whether we want to enable chatter, or lightning or multi-currency, usually you login, go to setup and enable all those, here we can define all the different preferences and features we want on our scratch.

Jenkins Setup

Jenkins is an open-source, extensible automation server for implementing continuous integration and continuous delivery. You can easily integrate Salesforce DX into the Jenkins framework to automate Salesforce applications testing against scratch orgs.

To integrate Jenkins, we assume:

  • You are familiar with how Jenkins works. You can configure and use Jenkins in many ways. We focus on integrating Salesforce DX into Jenkins multibranch pipelines.
  • The computer in which the Jenkins server is running has access to your version control system and to the repository that contains your Salesforce application.

Before integrating your Dev Hub and scratch orgs into your existing Jenkins framework, configure your Jenkins environment. Our example assumes that you’re working in a package development model.

  1. In your Dev Hub org, create a connected app as described by the JWT-based authorization flow. This step includes obtaining or creating a private key and digital certificate.
    Make a note of your consumer key (sometimes called a client ID) when you save the connected app. You need the consumer key to set up your Jenkins environment. Also have available the private key file used to sign the digital certificate.
  2. On the computer that’s running the Jenkins server, do the following:
    • Download and install Salesforce CLI.
    • Set the following variables in your Jenkins environment by going to Credentials > Select your project folder > Global Credentials > Add New Credentials:
      1. HUB_ORG (DevHub username ID) – Kind: Secret Text
      2. CONNECTED_APP_CONSUMER_KEY – Kind: Secret Text
      3. JWT_KEY_FILE – Kind: Secret File  
      4. Repo access credentials (GitHub Username and Password)
    • The names for these environment variables are just suggestions. You can use any name as long as you specify it in the Jenkinsfile/Build process.
      You can also optionally set the SFDX_AUTOUPDATE_DISABLE variable to true to disable auto-update of Salesforce CLI. CLI auto-update can interfere with the execution of a Jenkins job.
  3. (Optional) Install the Custom Tools Plugin into your Jenkins console, and create a custom tool that references Salesforce CLI. The Jenkins walkthrough assumes that you created a custom tool named toolbelt in the /usr/local/bin directory, which is the directory in which Salesforce CLI is installed.

Jenkins Build

Now we have to specify on Jenkins the steps needed to build our project, create our scratch orgs and run our tests:

  • On your Jenkins project > Click Configure 
  • Add your repository credentials on Source Code Management section:
  • Set build triggers:
    • For CI, Jenkins should be triggered every time a change is merged to your branch (H / 5 * * * * means it will pull changes every 5 minutes)
  • Enable Xvfb so jenkins can run graphic interfaces (for UI tests):
  • Bind your previously created environment variables:
  • Set Custom tools (Salesforce DX previously installed).
  • Provide Node and NPM if needed.
  • Add a build step:
    • Execute Shell:
  • Add post-build steps if needed, we will use junit and allure reports on this:
  • Click Apply/Save button
  • Go to your project and click the Build Now button
    • It will start building your project following the steps you specified on the ‘Execute Shell’ window.
    • You can open the execution console and see the progress
    • If you added post build steps they will be executed accordingly.

That’s it!

If you followed all the steps you should be able to run your Salesforce DX Project, Automation framework, and Jenkins to automate testing and achieve Continuous Integration!

Learn more about Salesforce development from our team, or check out our testing services.

API Testing with the Karate Framework

This article has two goals. The first is to find interesting information about API Testing with Karate. The second is to help you discover how interesting test automation is and dive deeper into the knowledge behind the passionate job of testing.

And why testing and not Quality Assurance? In this topic, I follow Michael Bolton when he says “Testers: Get Out of the Quality Assurance Business” Words matter and this is a matter of expectations management: we cannot promise something we cannot accomplish.

Michael Bolton

The Forgotten Layer of the Test Automation Pyramid

When we think and design a testing strategy we should not forget The Forgotten Layer of the Test Automation Pyramid: The service layer.

Here is where we need to mention the test automation pyramid. This concept is introduced by Mike Cohn in his book Succeeding with Agile.

He describes three levels of test automation, their relationship, and their relative importance. The base layer consists of unit tests and the top layer corresponds to user interface-level tests.

Many times when we start testing without a proper strategy we end up doing the opposite: investing most of the time and the effort in UI tests, which are more expensive to develop and maintain than unit tests. Also we can forget to develop tests for the service level, that’s why they call it the forgotten layer.

As Joe Collantonio described some years ago now, API testing is becoming more and more important. So even if we agree or not with the test automation pyramid schema, it reminds us that we have to pay attention to API testing as part of our strategy.

Software Development Life Cycle

We’re into a spatial representation of the job. As we move down in the testing pyramid, the tests are cheaper, easier to develop, and can find issues in earlier stages, which makes them easier and cheaper to fix than in later stages.

This can be seen as moving left in the Software Development Life Cycle (SDLC), so many teams are involved in Shift Left Testing. Is that enough? It’s not, but it’s a really good move. Which is the next step? Continuous testing. Involve testing in every stage of the SDLC, doing it efficiently, doing it repeatedly, as part of the whole process.

Here is when selecting the right tools becomes important: a testing tool that can integrate with our CI (continuous integration)/CD (continuous delivery) systems is a great value.

API Testing Resources

As API testing becomes more and more important, we can find a lot of sites to help us learn more about it. I can suggest just a couple of them which I found very useful:

Learn more about the Karate framework

Why is Karate so attractive? Because it’s an open-source tool that combines API test-automation, mocks, performance-testing, and even UI automation into a single, unified testing framework.

Let’s take a look at some of the benefits:

  • Language neutral
  • Suitable for non-programmers
  • Elegant DSL syntax
  • Built on Cucumber / BDD Syntax
  • Integrates into existing CI/CD
  • Good documentation
  • Good demos

This Hello World example gives an idea of how simple yet powerful it is.

Peter Thomas provides a deeper explanation in his Webinar on Micro-services Testing With Karate.

I found really good arguments about how we can leverage the goods of Karate for our own project. Learn more in the following example: Karate, the black belt of HTTP API testing?.

Some points that look interesting are:

  • Tests = Documentation: tests are so easy to read that you can document your API with your tests. And as you have to maintain your tests as the API changes, you have your documentation always up to date.
  • Simple: Karate takes care of complexity so you don’t have to worry about Json processing as Karate takes care of that.
  • Re-use Karate tests in Gatling to do performance testing: having the power of Gatling based on the API tests you already have is a big win.
  • Comprehensive and detailed reports: Karate brings powerful and detailed reports that makes reading the status of our tests very easy. It’s also helpful to debug and troubleshoot problems when you get failures. If you add the benefit of Gatling reports it’s like having two superpowers.
  • Data Driven Testing: you can run your tests through tables.
  • Mocks fake HTTP servlet: you can execute your tests with a mock server that implements your API.

Karate vs Rest-assured

Do you need to decide which tool suits better for your needs?

Refer more about the following comparison here.

Extra sources about Karate API Testing

I found very useful the following example in Test Guild site.
You can also check this demo.

Conclusions

I found Karate can be a great option for automating the checks in the forgotten layer, integrating it in your CI/CD schema, also re-using your tests as the documentation of your API and for performance testing.

Is the right tool for you? It depends on your particular project, your needs, and your team. If you want to add the API testing to your strategy, you don’t have too much time and you want to make it simple, it seems like a great option.

Learn more from our team here, or check out our testing services.

How to Integrate Salesforce with Python

Today’s post is about, you guessed it, using Python and Salesforce together. Salesforce offers a few different REST API endpoints that allow us to interact with our org. They also offer a SOAP API, but we’re not going to use it today. In fact, we don’t need to worry about the endpoints at all. Thanks to a Python library called Simple-Salesforce.

Casinos are integrating salesforce with python to automate their sales processes. They see the benefits of being able to more effectively manage and track customer data, as well as improve the overall customer experience, which you can read more about at Olympia Casino review. Salesforce provides a wealth of capabilities for automating sales processes, and casinos see great potential in using this technology to improve efficiency and drive better results. By incorporating Python into their sales process, casinos can better analyze customer data and respond to customer inquiries more quickly. Additionally, the use of Salesforce automation tools allows casinos to more effectively manage customer relationships. Casinos are using Python because it is a fast, versatile programming language that can be used for automation and data analysis. Salesforce offers a variety of integrations with other software systems, so casinos can quickly build out custom applications. The integration enables casino operators to better track customer activity, optimize sales processes, and provide superior customer service.


We could do this all by hand with the built-in requests library. You would have to handle sessions, OAuth process and save tokens, deal with request headers, encoding and decoding JSON, creating configs to handle all the different endpoints, etc…

Elden Ring game developers integrate Salesforce with Python in order to increase efficiency and data analysis. The integration between the two platforms allows for quick and easy access to all of the game’s data such as caelid colosseum elden ring. This increased efficiency has helped the developers make better decisions about how to improve the game, which has resulted in a more immersive experience for players. Salesforce is an essential tool for managing customer data, and Python is a powerful programming language that can be used to automate complex tasks. By integrating Salesforce with Python, game developers are able to streamline their processes and improve efficiency. The integration allows the developers to manage tasks, profiles, leads, and more using Python programming. This integration also allows for data synchronization between Salesforce and the Elden Ring game’s database.

Simple-Salesforce Python Library

This is where the wonderful world of open source software comes to the rescue. A man named Nick Catalano created a library called simple-salesforce. From what I understand, he isn’t actively developing it anymore, but due to open source, the community has picked up adding features. It has about 50 contributors as of July 8, 2020. The lib is being actively developed, with new features added like bulk API support and formatted SOQL queries!


With a bit of the background out of the way, let’s start digging into the library and see what we can do with it. First, no better way to explain what simple-salesforce is than to quote the README itself:


Simple Salesforce is a basic Salesforce.com REST API client built for Python 3.3, 3.4, 3.5, and 3.6. The goal is to provide a very low-level interface to the REST Resource and APEX API, returning a dictionary of the API JSON response.

Simple Salesforce


In plain text this quote means Python 3.x is supported, REST requests are handled for us, and the data we want comes back as a native Python data type. Great! Just what we want.


Login Information


First up, we’ll need a few things from Salesforce. Three things to be exact. Our username (email), password, and security token. The username and password should be pretty easy to find in your profile settings in your Salesforce org, but where do we find the security token? We don’t really see it, rather we’ll need to reset it.


After clicking “Reset Security Token” , you should be sent an email containing your new token. Save this, we’ll need it in the next steps. That’s all we need from Salesforce to get up and running. Now that we have that, let’s start building our Python script and start playing with our org.


pip and pipenv

But first, a quick word about PIP. While working on this example, there was an update to simple-salesforce lib. Github has the current version and we need the format_soql method from it. But pip (PyPi) hasn’t been updated with the new version as of yet, July 2 2020. So, we’ll need to install it via it’s repo on Github.


pipenv install -e git+https://github.com/simple-salesforce/
simple-salesforce.git#egg=simple-salesforce

If you are using the demo repo I built, we won’t need to worry about the requirements or dependencies if using pipenv. The demo has a Pipfile that’s pulling from the repo already thanks to the magic of pipenv.

The code

Now, let’s write some code. First up, we’ll bring in the libs we’re going to use. The only one that is not part of the standard lib is simple-salesforce:

from simple_salesforce import Salesforce, format_soql

from pprint import pprint
import json

Simple enough, import simple-salesforce, pprint (pretty print), and json. pprint is only used to make the terminal output look better, so it’s not needed for the core examples. json is used to get the credentials from a .json file, which is what we’ll do next.

# open file holding our login information
# we have the login info in a separate file so we can
# add it to .gitignore to help prevent leaking the information
# environment variables could also work
with open("login.json", "r") as login_file:
    creds = json.load(login_file)

Keep credentials secret

If you were on a project working in a private repo and multiple people needed access to the login credentials, keeping login info in the script itself would be okay, not ideal but okay. The reason we’re doing it is because it’s good practice and it’s open to the public on Github. So hiding and not committing sensitive information is important. This goes for any language or code base.

With that disclaimer out of the way, I included an example login.json file called very creatively “EXAMPLE_login.json“. Let’s take a quick look at it.

{
    "login": {
        "username": "[email protected]",
        "password": "My-REALLY-amazing-password",
        "token": "kdjfghdgfFGJbDFgd36DFGHDfgh"
    }
}

Very simple json object only containing the three things we got from the last steps. You can just copy/paste the “EXAMPLE_login.json” and rename it to just “login.json“, then update it with your login information. You can do this in the file explorer or VSCode, but here’s a quick example to do it from the command line.

cp EXAMPLE_login.json login.json
vim login.json

Salesforce Object

With our new login information, we can create the salesforce object back in our python script.

sf = Salesforce(username=creds['login']['username'],
                password=creds['login']['password'],
                security_token=creds['login']['token'])

And that’s it! We now have an object that represents our org, and now we can start doing cool things like SOQL or DML. Next, since we have everything we need to start awesomeness, let’s try a simple SOQL query.

SOQL Query

# an example of running a simple SOQL query
SOQL = "SELECT Id, Email FROM Contact"
data = sf.query(SOQL)
for d in data['records']:
    pprint(f"{d['Id']} -- {d['Email']}")

We defined the query string to get the Id and Email from all the Contacts, called the query() method of our salesforce object, then looped through the returned records and display the results. A note to those new to Python, in the pprint() we use something called an f-string or format string. It makes it easier to embed variables in strings, much like the way Aura Components handle expressions with {!v.my_var}

SOQL is cool and all, but what about adding new data to our org? We can do that too, very easily. We’ll even try using the bulk api to insert 1,000 record. But first we need to create 1,000 records. This is going to be mock or fake data just for the sake of simplicity. We’ll also be testing on the Account object, so only thing required for new records is the Name field.

data = []
for i in range(0,1000):
    data.append({
        "Name": f"Bulk Test {i}"
    })

Now we have a list of dictionaries that represent our record data. Here we have a for loop filling a list with new items. We could also use list comprehension to replace these 5 lines of code with just one.

data = [{'Name': f"Bulk Test {i}"} for i in range(0, 1000)]

Bulk Insert

To bring these new records into Salesforce, we use the .insert() method for the object we want, coming from the salesforce object we created. Confused yet? Here’s the insert code, it should help make things more clear.

# insert the new account using the bulk api
x = sf.bulk.Account.insert(data, batch_size=10000, use_serial=True)
pprint(x)

Here, we’re telling our org we want to use the bulk api “sf.bulk“, then which record object we’re working with “.Account.“, and finally what we want to actually do “.insert()“. We could use any object too, doesn’t have to be just Account. Even custom objects work, so instead of where Account is, we can replace it with something like sf.bulk.MyCustomObj__c.insert(..... We can also specify the batch size, or to process in serial.

Bulk SOQL

If you visit your org and take a look at all Accounts, you should see 1,000 new accounts with names like “Bulk Test 42”. We can also try doing another SOQL query, this time we’ll use the bulk api for the query. We’ll also show how to use things such as “LIKE” in SOQL statements.

# now lets get those records so we can delete them
SOQL = format_soql("SELECT Id, Name FROM Account WHERE Name LIKE '{:like}%'", "Bulk Test")
the_accounts = sf.bulk.Account.query(SOQL)
pprint(the_accounts)

Simple-salesforce now comes with the handy little method called format_soql that allows us to do things such as LIKE. format_soql is also the reason we used the Github repo for pip instead of what’s on PyPi, the new method was just introduced in the last 2 weeks.

Now that we know we can insert and add new data and records to salesforce, let’s see about removing it. Looking at the README, seems like the delete() method needs a list of records containing the Id of the record to be deleted. The records need to be a key-value pairs or dictionary just like how the query was returned. We already have all the Id’s for our inserted record from the “bulk.query()

{'Id': '0013h00000EdP87AAF',
  'Name': 'Bulk Test 998',
  'attributes': {'type': 'Account',
                 'url': '/services/data/v42.0/sobjects/Account/0013h00000EdP87AAF'}}]

Looks like simple-salesforce also returns something called “attributes“. This just tells use which object we’re working with and which api endpoint we got the information from. For our example, and for the .delete() method, we only need the Ids. So let’s clean up and make a new list with only what we want.

account_ids = []
for a in the_accounts:
    account_ids.append({"Id": a["Id"]})
pprint(account_ids)

Here is another opportunity to practice list comprehension! See if you can get that for loop down to one line.

Bulk Delete

So now we have the list of Id’s, now we just simply call the delete() method and go refresh our org’s Account list.

data = sf.bulk.Account.delete(account_ids, batch_size=10000, use_serial=True)
pprint(data)

All the records we inserted are now gone!

Final Thoughts

In conclusion, let’s recap what we’ve learned. For one, Python is awesome. Second, integrating Salesforce in a Python project is very very simple. With only three pieces of information, we can create a native Python object representing our Salesforce org, do things with the object like SOQL and DML, and finally have access to multiple salesforce API such as bulk or search.

This is only scratching the surface. We can do much more and simple-salesforce also has methods for metadata and describe. From this basic example, we could bring in Salesforce data to Flask API’s we build or insert new data to Salesforce from a data scraping crawler we make in Python.

We can also harness the power of Python’s ecosystem of visualization and reporting such as Pandas or SciPy. Nothing stopping us from grabbing Salesforce data and running it through machine learning or neural networks using PyTorch or TensorFlow.

If you’ve made it this far, thanks for reading! Here I’ll link the demo repo containing all the code discussed in this post and a YouTube video of my presentation. Also, if you are interested in learning more about Python, you can check this article: How to do Time Series Analysis with Python & Pandas.

https://www.youtube.com/watch?v=rf1jx3jbL2M&feature=youtu.be

How we connected Salesforce and Slack

The Oktana team built a demo to share how Salesforce and Slack work together. Our team leader walks through how the team built a Node.js app on Heroku that connects to the Slack API and Sales Cloud. The app is capable of both reading and writing to Salesforce from Slack.

You can create and update Salesforce tasks without ever leaving Slack. If someone else updates or assigns a task to you in Salesforce you’ll get a notification alongside all your other Slack messages. Take a look and let us know if something like this might be a good fit for your company.

Hope you’ve found this full walkthrough useful and insightful. We are Salesforce platform experts and offer custom development to help you build your platform and solve the right problems. Our team has worked with different organizations and their projects. If you want to know more about our work, go check out our latest success stories.

App Development with Salesforce Technologies

Working together with our partners to bring ideas to life is one of the driving forces behind everything we do here at Oktana. That’s why when Huge approached us to help them with app development for Stanley Security; we leaped at the chance.

Stanley is a large security company specializing in commercial security systems. They needed a tool for their field sales team to use on the go that showcased their current product offerings. Also, they preferred to manage the process through the app, on either computers or tablets.

Huge has excellent skills in front-end development and was planning to develop the app and the UI/UX elements internally. But they needed a partner to help complete the backend work and sync everything up with Stanley’s Salesforce instance. That’s where the team at Oktana came in. Huge was able to focus on designing a front-end experience that would satisfy Stanley’s sales team. Meanwhile, Oktana could focus on a seamless experience on the back end.

How do the front and the back of this application work, and what did it take to make them play nicely? The front-end app was built utilizing React and Node.JS, managed with a Postgres database that Huge hosted on Heroku. For our backend development, we needed to make sure everything tied into the Postgres database correctly. To do that we utilized Heroku Connect to transfer between the front-end database and Salesforce. Additionally, we mapped all the data so that everything was stored where it needed to be on both ends of the application process. This application’s design was for interfacing with Stanley’s Salesforce organization, and it required a Salesforce login to access the app and all of its features. The login ensured that anyone using that app is a part of the sales team at Stanley. 

Now, beyond the basic connective functionality, we needed to complete all aspects of the sales cycle through this app. This included allowing the sales team to send emails for clients with sales details and other information. To make that happen, we built an email tool using Apex and Visualforce. Stanley also wanted to close sales within the app, so we built in Adobe Sign functionality. Sales contracts could be signed digitally, and Zuora payment systems facilitated immediate payment. The final step was to synch the new data with the Salesforce organization.

The key technologies used in this project include:

  • Salesforce
  • Heroku
  • Postgres
  • React
  • Node.JS
  • Heroku Connect
  • Apex
  • Visualforce
  • Adobe Sign
  • Zuora

This project allowed us to work collaboratively with another development team to build different parts of an app. We’ve been able to successfully demonstrate our skill and ability to understand other’s work and apply it to our goals.

We’re looking forward to working with both Huge and Stanley again in the future. If you have a project that we can help you with, please be sure to let us know!

Learn more from our team here, or check out our custom development services.

Connecting Salesforce and Slack

We’re always looking for new challenges here at Oktana. One recent challenge that presented itself to us came from our partners, a leading investment firm. This investment firm out of California works with growth-stage companies in a wide variety of industries. They approached Oktana to help them find a solution to an efficiency problem within their organization. The primary tool that they used within the organization for work was Slack, and several different apps designed to interface with it. Their employees had to switch between Salesforce and Slack to manage updates and new tasks that would populate through Salesforce.

That’s where Oktana came in; the firm wanted a way to integrate Salesforce into their Slack experience to help save everyone at their company time and energy while they’re working. What could we do to bring these two platforms together? We started by exploring what tools might already exist within Slack that would make this integration quick and easy and found Incoming Webhooks. With Incoming Webhooks, we were about to take any new notifications from the Salesforce org about new task assignments and send them to users within the Slack instance.

This implementation was a success, and users were receiving notifications, but it was apparent that it wasn’t going to be the right solution for the long term. There were severe limitations to what we could do with Incoming Webhooks. While it could bring in notifications from Salesforce, it wasn’t able to limit those notifications to those directly involved with the task and instead sent them indiscriminately to the entire team. Additionally, there was no way to talk back to Salesforce after you received a notification in Slack, Incoming Webhooks is a one-way street. As such, we decided that we would need to take a different approach to solve this problem.

Thankfully, our partners at the firm were receptive to these concerns and were open to our recommendation for another option that might better suit their long-term needs. Since Incoming Webhooks did not fit our needs, there was only one course of action to take at this point. We needed to build a bespoke app to do the job. We created a small application in Node.js hosted on Heroku that would handle everything the investment firm required and more.

First, the app would replicate the functionality of the old implementation and take any task notifications from Salesforce and send them to Slack. Next, the app acts as a chatbot on Slack that can receive messages from Slack and send them back to Salesforce to update and create new tasks. Additionally, we built this app to be as lightweight and efficient as possible. At its core, the app is always listening to both sides, and when it detects something relevant, it translates the message and sends it from one application to the other. Oktana development process is about creating the most value possible for our clients. The lightweight nature of the app means it has space to grow and take on other functions so that the link between Salesforce and Slack can be expanded later on if needed. The app also can interface with applications beyond Salesforce if the need were ever to present itself.

The Critical technologies from this project:

  • Salesforce
  • Slack
  • Node.js
  • Heroku
  • Apex
  • Incoming Webhooks

This project was about seeing disfunction in how employees at the investment firm were working and finding a way to make it more streamlined. We saw that our client needed a solution for fixing their workflow, and we were able to accurately identify the problems as well as the best way to solve them. Now, they don’t have to move between Salesforce and Slack every time they want to update tasks, and we were able to face a new challenge head-on and solve it creatively.